Flashing Mozilla Firefox OS Flame Phone on Windows

tl;dr the shallow_flash.sh file used to flash Firefox OS nightly builds t to phones such as the Flame now works on Cygwin on Windows. The reason for previous failure and the solution highlight a difference between Linux and Windows.

Mozilla’s Firefox OS is undergoing rapid development, with the cutting edge nightly builds Firefox-OS-Flame-Reference-Device-smallnow at version 2.2 (as compared to the less frequent Vendor supplied builds). Each Firefox OS phone has slightly different mechanism for flashing using these Mozilla builds but the general approach is similar. Basically a base version of all the full software stack (Gonk, Gecko and Gaia) is available for flashing and then partial builds update just Gecko and Gaia). There are also OTA updates that can be just Gecko & Gaia not requiring a reboot, or a full update (FOTA) requiring a reboot.

Firefox OS developers almost exclusively use Linux, or OS X. This is for good reasons,. In particular building on Windows can be slow as it is not so hot at processing lots of small files as required for a build. Something I soon found when building Desktop Firefox on my Windows laptop.

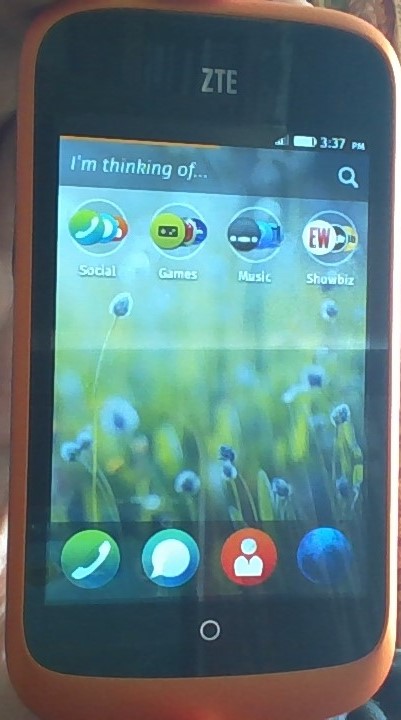
However, when it comes to flashing, we find that people who are not building the software also want to use the pre-built images on their phones and these community members are often using Windows. They often do not wish to build and may not be particularly technical. Also the Mozilla builds have been created with a full set of features that can be lacking from personal builds (at least they are from mine).

Unfortunately the official ‘shallow_flash.sh’ script used for the partial flashes has been developed for linux. Although it should work on the Cygwin linux ’emulator’ for Windows, flashed phones would never reboot. This has now been fixed.

The core problem with the script highlights another reason Linux is better than Windows for Firefox OS development. In short, Firefox OS uses the Linux kernel and HAL layer from Android. Thus the close match between target and host operating systems when using Linux reduces many problems. In particular, some of the files contained in the Gecko updates require the X (executable) file attribute in order for Firefox OS to work at all. Windows doesn’t have this attribute and so when the files are unarchived and pushed to the phone the x attribute is lost resulting in a dead phone. In fact Cygwin tries to emulate the x attribute, but it really only pretends it is on for files it thinks are executable, something completely useless for the Firefox OS files in question.

The good news is Cygwin provides all the wonderful *nix commands which have been used for years to perform administrative magic with seemingly little effort. The philosophy of using small focussed tools in combinations in order to get the job done comes to the rescue here. A single line can be added to the script to reset all those x attributes that got lost, Here it is

Without going into details this extracts from the .tar.gz archive the list of files with x set (and that are not also directories) and passes it to chmod to set the x attribute on the files on the phone. Simples.

While I was at it I also fixed a bug with the way local files were handled. A hack copying files to a temporary folder worked around the problem and could be removed with a simple fix. Also, when testing we found problems if the files were place in a folder with spaces in the name so that was fixed too.

Until the patch is merged in you can find the fixed version of shallow_flash.sh in this pull request .

In addition as the person this work  was for is not especially technical, I created a single zip file containing the script, the Firefox OS update files and a minimal version of Cygwin. This gives an easy download, unzip and run flash.bat UX. Since the Cygwin installer is complex and hardly accessible this might be useful to other folks too.

As a foot note having submitted this pull request I found someone else had recently submitted a similar pull request (though only setting the x attribute on a few predefined files).  I do wish I had seen this one earlier as it took some time to figure it was the x attribute causing the problem. Heh. Such is open source 🙂

Posted in development, Uncategorized | Tagged | 10 Comments

Setting up home and office networks with a single line and with wifi extension

tl;dr It is straight forward to connect a second Ethernet WAN modem/router/AP to a BT home hub (or other primary router) and configure it as a separate, independent LAN (TCP/IP subnet). A 3rd Wireless AP/Router can then used as a Wi-Fi client (or alternatively a bridge) to extend the secondary LAN over an air gap.

BTHomeHub5TP-Link TL-WR843ND


My home office has had its own dedicated copper telephone line and LAN/Wi-Fi since I started working from home. While having a dedicated line makes accounting a little simpler, I almost never use never use the phone as I have my mobile and also a wireless DECT connection to the home line. Since we moved the home line to BT Infinity fibre broadband (currently running at an uncapped 75/20Mbs) the home LAN has been much faster than the very cheap ISP office package from TalkTalk Business. I have thus been thinking of sharing the home network for work and dropping the office line completely. The home LAN use is not yet heavy enough that I need to worry too much about contention, though this might well change with 2 teenagers at home.

If sharing the BT line was to be successful I wanted to somehow keep the home and office LANs quite separate. In addition the office is separated from the house by a physical gap of about 3m and I didn’t particularly want to run a rugged Ethernet cable across the gap, preferring a wireless solution.

After a bit of research I’ve now got a very acceptable solution with separate LANs and full line speed available in office (most of the time). I upgraded the BT Infinity to uncapped speed and usage and negotiated a free Home Hub 5 to replace the old 3rd edition we’ve had since Infity became available. The Home Hub 5 is an excellent piece of kit, supporting 802.11ac for maximum Wi-Fi speed. I did debate using this for the office network and a Wi-Fi connection to it is always an option, though the 5GHz transmitter doesn’t reach the office.

After research and being very happy with a recently acquired TP-link Wi-Fi dongle, I broke with my long standing Netgear tradition and purchased two TP-Link TL-WR843ND Ethernet WAN modem routers. These have 300Mbs 802.11b/g/n Wi-Fi support (an Ethernet WAN connects to a cable modem rather than a copper phone line as with ADSL devices).

These TP-Link devices have 2 useful enhancements over the cheaper TL-WR841ND. For one, the Power over Ethernet feature makes it easy to place the device without worrying about the availability of a near-by power outlet. Secondly, it has a WISP mode designed for connection to wireless ISPs and I felt this might work well as an alternative to the usual Wi-Fi bridge arrangement to extend LANs via Wi-Fi which these devices also explicitly support (and it does).

So in outline the configuration steps I performed are as follows:

1) Set up one TL-WR843ND in  router mode (the default is WISP mode) with the WAN connection type set to dynamic IP (as the Home hub provides DCHP). Set it’s LAN IP address to 192.168.2.1 (it’s own DHCP server will update to match). This puts it on a different subnet to both the Home Hub and the office network.

Connect it’s Ethernet WAN input to a BT Home Hub LAN socket. This then works as a second router/AP but will be dedicated to connecting to the other TL-WR843ND via W-Fi to extend the office LAN (though you could always us it as a normal AP as well). I turned off  the SSID broadcast to make connections less likely. The home network uses the Home Hub as usual.

2) Configure the 2nd TL-WR843ND in WISP mode to access the first AP you set up above and use it as the office router/AP. Use the router’s quick setup option and/or the Survey button to find the first AP. This then provides wired and Wi-Fi access to office equipment. Use a different WIF SSID to the other TL-WR843ND and perhaps manually set the channel to be different to the BT Home Hub 2.4GHz channel  rather than auto mode (I used Ch 1 for the Home Hub and 13 for the APs).

Notes:

1) I had to manually set the Wi-Fi region on both routers to UK as it defaults to US.

2) A bug in the WISP mode of the TL-WR843ND means it assumes American Wi-Fi channels for the WAN. So, the first AP will not be not seen by the WAN Survey button if it is on channel 12/13 . The solution is to initially switch to router mode and change to UK region.

3) The office network connects via the the BT Home Hub which is possibly less reliable; should the Hub fail both home and office networks will go down. It should  be possible to swap the 2 routers so the Hub connects via the TL-WR843ND.  While I proved the TL-WR843ND works when connected directly to the fibre modem instead of the Home Hub, I did not check if the Home Hub has appropriate settings to work as the secondary router (I think not). I may need to revisit this if I hit problems going through the 2 routers, eg when hosting a website or needing port forwarding.

4) In theory it should be possible to connect both routers to the fibre modem. However the BT supplied ECI modem is locked so only the LAN1 socket works. It is possible to unlock the modem with special hardware but I did not want to go down this route.

5) I learnt the fickleness of W-Fi as when testing wireless access to the 1st router as I only got 20Mbs with my Dell XPS 12 laptop which got a full 75Mbs with the BT Home Hub. Having checked everything was the same and proving wired access was full speed, I tried the Wi-Fi access from other devices. Needless to say the TP-Link dongle work best and I got mixed results from other devices. I can only assume some strange incompatibility with the XPS Wi-Fi

6) As the WISP client mode worked perfectly well I didn’t try the Wi-Fi bridging mode. I’ve not idea if one mode is more efficient that the other.

7) When setting up the the routers don’t forget to set strong passwords and encryption.

Posted in Uncategorized | 2 Comments

On Converting a VM from VMWare to VIrtualBox

In short, don’t! It’s way too much hassle.

It’s so much easier to create a new identical VM in VirtualBox and set it to use the same virtual disk file (.vmdk). I  expect this applies when moving VMs in the opposite direction too.

Hopefully this note will save others a lot of wasted time discovering this after following various dead ends when googling for the answer. The bottom line is that while it should be possible to export from VMWare to the standard OVF format and import into VirtualBox, differences in interpretation of the format between the two make it difficult if not impossible (I gave up).

I’ve been using the VMWare Player for creating and managing my VMs on a Windows host for some time after my business partner experienced trashed VMs with our then preferred VirtualBox. However Since using windows 8.1 i found the mouse was offset when using an external monitor with my laptop, something which quickly made it unusable. Otherwise, to be fair, VMWare Player is fast and trouble free.

So I decided to switch back to VirtualBox and the wisdom on the web is to export and import via OVF using VMWare’s OVFTool.

1st problem, I had used VMWare Player’s default option to split the virtual disk file up. This actually make little sense if you have a file system that supports large files, and probably negatively affects performance. This can be resolved using VMWare’s vmware-vdiskmanager utility. Except this is now only available in the full VMWare Workstation. There is a trial version but guess what, it can’t be installed along side VMWarePlayer. So I had to installed and use it on another PC (and no, I didn’t it on a VM 🙂 ).

Exporting using OVTool takes ages and then the “Import Appliance” operation fails. The first problem is a disagreement on the SCSI disk driver. VirtualBox treats the SAS as a separate type to SCSI, whereas VMWare makes it a subtype.. Even if you comment the SCSI and disk sections out of the .ofv file before import, another error occurs with checking the hash of the virtual disk in the .mf file. I suspect “Import Appliance” should only be used with  “Export Appliance” to move VirtuaBox VMs between hosts.

So to summarise, the easiest solution for transferring a VM to VirtualBox to is to create a new VM in VirtuaBox, but without a disk. Make it as close as possible to the original VMWare VM. Then add a SAS driver and attach the existing .vdmk virtual disk (or a copy of it).  You’ll need to install the VirtualBox support drivers if it’s a Windows VM.


Posted in opensource, Win8, Windows | Tagged | 14 Comments

Help: I bricked my Firefox OS device by enabling the Accessibility Screen Reader!

Well you would fiddle, wouldn’t you! 😉

The screen reader feature as introduced in Firefox OS 1.3 is experimental – hence it is burried away in the developer settings. If you are not familiar with mobile screen readers you will find it difficult to turn it off once enabled, but it can be done if you learn a couple of new gestures. In 1.4, and beyond, the screen reader is more mature, easier to access and there is another way to toggle it on/off it using the volume up/down buttons.

tl;dr if you’ve just selected “screen reader” then double tap “screen reader” again to unselect it. If you have 1.4 use the volume key toggle explained below; If you’ve been tapping and swiping on 1.3 and gotton yourself into a right old mess then you need to navigate back to the “screen reader” option first. Do this by swiping right or left to move the selection rectangle and double tapping to drill down into the settings. This is similar to using Tab, Shift+Tab and Enter on a desktop. There may be scrolling bugs so sometimes you may find you can’t see the rectangle but the speech should tell you where it is  (just like it supposed too).

So how DO you turn it off? Well first you have to realise that the screen reader is designed for people with no or very impared vision. These users need a different way of interacting with the device that gives clear feedback on were they are in the UI. Thus speech indicates selected items in the UI and taps and swipes work differently to avoid accidently activating the wrong thing.

For the main gestures you might like to think of the touchscreen with the screen reader enabled as being a separate trackpad so there is no direct relationship with where you touch and what is on the screen at that point . Gestures can occur anywhere on the touch surface as follows.

  • Swipe left or right – selects the the next or previous item. One item is always selected and is shown with a focus rectangle drawn round it. This item is spoken about when it becomes selected.
  • Double tap – activates the selected item, just as if you had tapped on it when the screen reader is inactive

Thus you can move to any item and activiate it using these 2 gestures. For example between list items, in and out of nested lists, between icons on the home screen or select a checkbox. Just look for the item with the rectangle round it to see what will happen when you double tap anywhere on the screen.

Other screen reader gestures include:

  • Single press – selects item pressed. This alows random taps and provides orientation.
  • 2 finger swipe – scrolls up/down or left/right
  • Audio preview – press and hold, then move fingure around so each item under the finger is selected and spoken.

In Firefox OS 1.4 a new screen reader toggle on/off was introduced using the volume up and down buttons:

  • Press volume up and volume down in succession 3 times (6 distinct presses).
  • Get a voice prompt
  • Press volume up and volume down in succession 3 times (6 distinct presses).

See bug 957674 for full details of this feature’s introduction.

[UPDATE 22/05/14] Marco Zehe added some screen reader operation notes to the MDN Firefox OS Developer Settings documentation

[Update 2014-05-30] Added audio preview details.

Posted in a11y | Tagged | 32 Comments

Success! Firefox OS 1.4 built and running on ZTE Open

[Update 2013-04-13 : Trunk, currently 1.5.0.0 also happily builds and runs. Just use “BRANCH=master” with config and build] It’s been a long battle but I have finally got a Firefox OS 1.4 build running on the ZTE Open. I started my career in embedded development but had quite forgot how ‘interesting’ it can get, what with all the moving parts to get lined up (more thought’s below). To continue my previous post on getting the 1.2 release from ZTE working, I’ll now explain how to build and run Firefox OS 1.4 starting out with the the 1.0 installed on my device from ZTE on eBay. WIN_20140413_153727 (2) 1. Upgrade the phone to the FirefoxOS 1.2 provided by ZTE (US & UK) and test. (Actually this is probably unnecessary) 2. Build 1.4 according to the MDN build instructions.. I built the user version (no test apps and optimised)

3. Flash the built .img files to the phone. This was the hard part to solve. Mozilla provide a nice little ‘flash.sh’ script which wraps up all the details of using adb and fastboot for each device but I have never got it to work. Neither could I get a manual flash to work as described in the MDN ZTE open page. The problem seems to that the ZTE fastbboot implementation reboots during a flash command (possible related to size of the image). The solution is to use the Windows NandDL_firefox tool provided as part of ZTE’s 1.2 release. This uses a special phone mode to copy files and flash them and does not require adb or fastboot. You may have realised that Firefox OS cannot be built on Windows (at least I have not tried with Cygwin or MinGW). Thus you need an VM or 2 machines. In my case I ran Ubuntu 12.04 as a guest on Windows 8.1 and shared the files between them. The only problem I’ve found is that even with almost 8GB and 4 cores in the guest some builds still fail with a mysterious build error 2. This is most likely due ot resources as a build on a Ubuntu machine is fine. To use the ZTE NandDL_firefox tool simple create a folder with the following files

The 2 .mbn files are copied from the ZTE 1.2 release while system.img and userdata.img are those built and found in …/B2G/out/target/product/inari. That leaves boot.img which we need as the default ZTE 1.2 one does not work with the built images. Unfortunately this is not built for some reason (perhaps legal). However it is possible to create a working image such as Emanuel Hoogeveen’s boot.img  which I used (see bug 925502 for more details). To flash the phone:

  1. Install the Windows ZTE USB driver.
  2. Run the ZTE NandDL_firefox tool (ensure the .bin file is in the same location as the exe).
  3. Remove the phone battery and press the volume up and down buttons while plugging into the computer via a USB cable.
  4. Select the folder containing the files.
  5. Ensure only the 3 image file (boot, system, userdata) are selected in the checkboxes.
  6. Click the bottom left button to start the upload.
  7. When the phone reboots remove the usb lead, fit the battery and restart.
  8. You may want to enter Recovery mode (hold volume up and power up) to clear the data and cash (ie factory reset).

Once Firefox OS 1.2 or later is installed you can use the Firefox App Manager to manage your apps being developed on the phone, possibly in addition to developing them in the simulator.

Final Thoughts

Mozilla’s reason for creating Fireox OS is to ensure everyone can access and particiapte in the internet/web using fully open mobile technology and services. This is an important part of the Mozilla Manifesto. For this to work Mozilla needs partners who really get what openness means and, in particular, provide support for their devices thus allowing anyone to build and update the majority of software on the device and not just Apps (ideally all of the software should be buildable). Unfortunately ZTE have rather fallen short of this so far, making it extremely difficult for anyone wanting to develop Firefox OS on the ZTE Open. This can be easily seen by the result of a few web searches. Unfortunately this reflects badly on Firefox OS, and so Mozilla, as the developer experience with the ZTC Open is so very painful. I really hope ZTE will get on board and help play their part soon. The phone is certainly popular as a cheap developer device and they could do well with it while gaining respect from open mobile developers. We can only hope the partners behind devices like the Flame and soon-to-be- available Tablets are more switched on! The biggest pain point is ZTE’s failure to provide a full implementation of fastboot on the phone. This was supposed to have landed in their update to 1.1 but my and many other’s experience is it just does NOT work. Come on ZTE! I suspect that sadly many phones have been bricked and left in exasperation as  a nice orange paperweight. I know I nearly did that with mine. I’m so glad I didn’t do this as I can now play with almost any aspect of Firefox OS should I want/need to. That’s *my* definition of “Open”.

Posted in mobile | Tagged | 35 Comments

ZTE Open – upgrading to Firefox OS 1.2

[Continued in Success! Firefox OS 1.4 built and running on ZTE Open]

I’ve just bought a ZTE Open phone with the intention of exploring Firefox OS, Mozilla’s new HTML-based, fully open mobile operating system. The idea was that at £54 pounds from ZTE Europe on eBay it is a very low cost entry into building Firefox OS apps or the OS itself. Little did I expect it to be such a pain but the good news  is I finally managed to get it going and thought I should share how.

The phone is OK but you get what you pay for. It reminds me of the very cheap Galaxy Europa I one brought a couple of years back.  With my fat fingers it’s very hard to type on the seemingly inaccurate and very small touch screen. A passive stylus doesn’t work either. However, it works well enough as a basic smartphone.

ZTE Open

First the problem; the ZTE Open I received was at OS version 1.0 and I obviously want to hack on the latest (1.3 /1.4) and send updates to the phone. Also, the easiest entry  to developing apps is to use either the Firefox OS Simulator or the Apps Manager connected to a real device running 1.2 or  higher.

You know what it’s like, you hit a problem and Google throws up loads of fixes that have worked for others. The problem is that these solutions are often slightly different being discovered at various times since the problem 1st appeared and many subtle changes have occurred to the various bits of software or hardware, thus breaking the solutions. I got extremely frustrated and was even informed that the phone has been nicknamed the “ZTE Closed” by some folks at Mozilla. Anyway I won’t waste time on all the dead ends I tried but simply present the final solution that worked for me. I will just mention that I had no luck with the MDN page or  Mozilla Hacks article that’s worked for many – “fastboot devices” would just not work. I missed the note in that post to the solution that eventually worked for me (after a few problems). It might be due to my using Windows as host rather than Linux but I found the alternative solution before I tried on Linux.

So the solution:

  1. Upgrade to 1.1B02 using the SDCard method provide by ZTE (US & UK)
  2. Upgrade to 1.2 using the phone download method provided by ZTE (US & UK)

The 1st step is probably not needed but I performed it as an early step anyway. I modified the second step to also update “system” which is not shown selected in the ZTE instructions.

ZTE Open Firmware site

As is so often the case once I finally solved it I found the perfect source of information. I don’t know who owns the site but zteopenfirmware is a real mine of information on the ZTE Open phones firmware. They even provide advice on using version 1.3 and 1.4 which I intend to build and flash soon as an exercise. While I discovered the same answer, I’d be hard put to provide such clear details on upgrading the ZTE Open. Thus I simply refer you to this excellent resource.

Hopefully this short post will save a few others some pain. Good luck and happy hacking.

PS. if you like such things, here is a draft user manual for the ZTE Open (pdf).

Posted in mobile, Uncategorized | Tagged | 4 Comments

Free international SAPI voices from Microsoft

Either this is a well kept secret of I’ve been asleep, but I’ve only just found Microsoft provide easy access to the SAPI voices provided with other language versions of Windows. The following is the case in my Windows 8.1 Pro but your mileage may vary as they say.

There don’t appear to be voices for every language, for example while I got German, I didn’t get one for Greek. There are several provided for Spanish.

In order to get the extra voices you simple go to Control->Panel->Language and add a  language. When you double click on the new language you get (after a pause) an option to download and install a ‘Language pack’. This install takes forever, but eventually the new SAPI voices then appear in the Windows TTS options as usual.

Additionally the language at the top of the list selects the system used for Windows text and is also reported to programs. You will need to log out or reboot for a change to take effect. We use this in the latest Maavis installer to provide internationalisation support for the Cloud4All project.

Microsoft have done an excellent job with internationalisation – it’s a very clean user experience.

Posted in Assistve Technology, Uncategorized, Windows | Leave a comment

User experiences for low digital literacy and cognitive disabilities with Firefox

[Update 2014-02-15] I’ve just discovered Mozilla X-Tag that allows extension elements to be created much like XBL. It’s a library rather than native browser implementation (’till W3C Web Components land) and I’m not sure if it allows nesting and inheritance which I used, but it’s a great start.

Back in 2007 I worked with University of Sheffield’s ScHARR RAT group to create a prototype framework providing simple non threatening access to media and communications for people living with dementia. The Maavis design bucked the trend in full featured user experience by using a touch monitor, big buttons with text and images along with a consistent navigation model.

Maavis provides access to photos, videos, music, web pages, programs and video calls , but avoids appearing to be a complicated computer. It proved very successful with the target audience, who welcomed it and enjoyed enhance communication experiences with others. We also found clear applications opportunities and interest for people with learning difficulties and other groups with low digital literacy.

Since then of course, simpler touch enabled, button-based access has become the norm on phones and tablets and this is extending to touch enabled laptops with Windows 8, Ubuntu Linux and perhaps, even Android. The smaller friendly form factors of tablets coupled with apps that have simple user experiences have proved very effective with people living with dementia and others with low digital literacy. See for example the work of charity Alive! in using iPads improving the quality of life of older people in care.

However, there is in general apps a considerable complexity in interaction and cognitive load for the user groups Maavis is aimed at. Especially if they are to be use unassisted. Beyond the launcher home screens the experience is often complex, plus there is much inconsistency and lack of clear affordances showing how to interact. The range of gestures that are used may be good for proficient users but can be daunting to many. Thus there is still a clear need for something like Maavis.

What’s next?

It’s clear to OpenDirective that there is wide demand for products and services based on the Maavis concepts and in a number of market segments. In addition to the applications mentioned above, use in the third world is opening up with increased mobile device ownership infrastructure coupled with lack of historic experience with western tech. However,  despite tentative development efforts using HTML technology, further collaboration with ScHARR and funding application to Technology Strategy Board , OpenDirective have not yet shipped a product.

I believe now is the time to play to our strengths which lie more in the ‘softer’ tech skills of community and collaboration. Accordingly, in the newly launched Properity4All EC project OpenDirective is working on developing frameworks for low digital literacy and “stepping stone” applications that provide a bridge to stronger technical literacy. We will also be using our Maavis based product work (codenamed ‘Brian’) to evaluate the collaborative technology and tools developed in Prosperity4All. This work also builds on our participation in the related Cloud4All EC project where we have integrate Maavis with the automatic accessibility personalisation infrastructure being developed.

These are exciting times for technological developments in support of those with low digital literacy and cognitive disabilities. Awareness of and commitment to support for living well with dementia  is growing across the board in the West as the population ages. That includes the recognition of the need for improved access to technology to be use as part of the proposed telecare solutions. In addition web accessibility has mature through the efforts many dedicated folks. Open Development and agile are also well embedded in commercial software developments. An  exciting recent development which specifically targets this area is the W3C Cognitive and Learning Disabilities Accessibility Task Force led by Lisa Seeman. Thus we now have a excellent opportunities for establishing good practices though community and frameworks.

From Mozilla Firefox XUL to HTML5

The original Maavis was developed as a Firefox extension, using the Mozilla XUL technology. This proved reasonable at the time, though as always there were hidden gotchas to be dealt with. The main reasons for choosing XUL were:

  • Ability to run full screen in kiosk mode and appear to function as a windows program
  • The firmly open collaborative stance of Mozilla and their dedication to accessibility
  • Great community, especially support and access to the devs.
  • Cross platform technology leaving few areas to be handled such as TextToSpeech
  • Interesting HTML like tech with  XBL for custom tags and XPCOM for extensions
  • JavaScript extensions such as code modules and more recent language version.
  • Excellent tooling including debuggers and first class MDN docs
  • Open source – goes without saying  but allows custom builds of Firefox as a very last resort

Now however, times have moved on and the HTML5 etc technologies have matured rapidly, so much so that nearly all of those reasons apply equally to HTML technologies. New core features and APIs mean a simpler technical solution and frameworks add more value (at the risk of bloat and increased load times). Further, the VERY large number of people familiar with HTML removes one barrier to attracting developers. Plus HTML offers a fairly low skills entry barrier. Accordingly we’ve be working on using HTML for Brian.

During the original development I hit 2 real pain points; crating a resizable grid layout of buttons and really simple video conferencing. I believe both these are now easily supported in HTML. The resizable “true grid” layout in particular was huge amount of work, requiring numerous hacks and work-arounds. This was well before responsive design was a twinkle in Ethan Marcotte’s eye but was a firm requirement. The solution I came up with used custom tags through XBL and I’m very pleased with the clean declarative solution to defining screens of buttons. However, XBL never ‘took’ in HTML and while there are useable frameworks I’m not convinced they are the way to go. Now the CSS grid layout looks like the perfect solution for layout.

For video conferencing we wanted a really simple and uncluttered UX and in-fact Apple FaceTime which came out later was pretty much what we after. However, after trying the few  suitable video call apps we settled on trying to automate Skype. This was a nightmare. The APIs (at least those freely usable in an OpenSource project) only let you make or receive a call through the Skype programme, with all its horrid UI clutter and noise. Plus API bindings were severely limited. In the end I used a Python server, launched by Maavis which made the calls and also tried to control the Skype UI through synthesised key/mouse events. Naturally this is very fragile and it broke every Skype updated. I lost a lot of hair over this single feature which is easily the most popular with users. But now we have WebRTC supported in three browsers (oh and Microsoft’s variant in IE) that allows more control and peer to peer calls. I am hopeful.

FirefoxOS

Firefox still looks very interesting as a platform in this space, but largely for different reasons to before. FirefoxOS‘s native support of HTML, coupled with the Marketplace app store and a truly open source solution are all strong pulls. The low cost of the FirefoxOS mobile and tablet devices coming out from Mozilla partners simply add to the attraction, especially if consider supporting the Global South. Mozilla are looking at africa later this year.

We’ve previously looked at Windows Modern HTML apps, but while it has wide spread and is technically very good, it’s utterly commercial solution with there’s a awful lot of proprietary stack. Plus devices are currently all high end and so expensive.

Time to explore FirefoxOS, especially now tablet support is being worked on.

Posted in opensource | Tagged , | Leave a comment

Adding a sleep button to Dell XPS 12 convertable ultrabook

I’m really happy with the Dell XPS 12 convertable ultrabook I’m now using as my workhorse machine, even after seeing the lighter Lenovo Yoga at the recent Presperity4All project kick-off meeting. One thing has been annoying me,though, and that is the lack of flexibility in sleep modes.

XPS 12

Specifically the problem is wanting slightly different power behaviour between laptop and tablet modes, something the stock Windows 8 options do not allow for. When in Laptop mode I want the power button to instigate hibernate as shutting the lid will put it into sleep mode. However that means when in tablet mode there is no way to enter sleep mode, something you really need when transporting the device to avoid accidental touch events causing mayhem.

It’s easy to add a shortcut to enter sleep mode and put it on the Start Screen and Desktop taskbar. However, as I found a few “gotchas” I’ve outlined the steps here. The main problem is that if you have enabled hibernate as I have the usual sleep method hibernates rather than sleeps. The usual method is to use “rundll32.exe powrprof.dll,SetSuspendState 0,1,0”. The solution is to use Mark Russinovich’s venerable PsShutdown.exe from his SysInternals collection.

The steps are:

  1. Install PsShutdown.exe, available from Microsoft as part of the PSTools or SysInternals suites.
  2. Create a shortcut in %ProgramData%\Microsoft\Windows\Start Menu\Programs named Sleep. This location allows it to be added to the start screen and desktop task bar.
  3. Set Target: to “<Somewhere>\psshutdown.exe” -d -t 0 (ie suspend in 0 seconds) and Run: to minimised.
  4. Set the icon to something you like. I used the red power icon in %SystemRoot%\system32\SHELL32.dll.
  5. Search for Sleep eg press Windows key and type “Sleep”.
  6. Right click on your Sleep icon in the results list and select “Pin to Start” and “Pin to Taskbar.

That’s it. I found you need to press the Windows button on the screen bezel to exit sleep.


Posted in Windows | 2 Comments

Sending emails with PHP on cheap hosting

Many cheap or free share hosting services block the PHP mail() function so it silently does nothing. For example, I just added a contact form to a small WordPress based web site for a friend but it didn’t work as the web hoster, xtreemhost, block it (or everything gets heavily spam filtered, which amounts to the same thing).

The solution is to use a separate SMTP mail server and this is actually quite simple using one of the most popular PHP mail solutions PHPMailer and a Gmail or Google Apps email account. Most SMTP servers will block such so called “relaying” when sending from different domain to the mail server. However, if you have a GMail account you can use the Google SMTP server authenticated as that user.

In my case, I just added a new account to our family domain running on GApps and used that. I added the minimum PHPMailer files required (class.phpmailer.phpclass.smtp.php and PHPMailerAutoload.php) along with a child theme with my new mail() function in the functions.php file. Well, actually, I found the PHP override/replace functions for built-ins didn’t work so I had to edit the plugin code to use a new mail function explicitly, rather than just redefining it in the child theme. Not ideal, but an acceptable maintenance weak point.

The PHPMailer examples include one for using GMail SMTP.

Posted in development, opensource, PHP, web, WordPress | Leave a comment